Here in this tutorial we will play with CSS to add border around blog post. We will add some lines of code in your blogger template. By using these lines of codes we can change the background color of the post body by following this tutorial.
Now read continue full post and give a different look to your all blog posts by adding border to blog post. Now see two different method to display border around blog post.
Now you can see after adding border around to blog post its looking different and beautiful. Now follow all steps one by one and add border around blog post in your blogger website.
- Login to your blogger website.
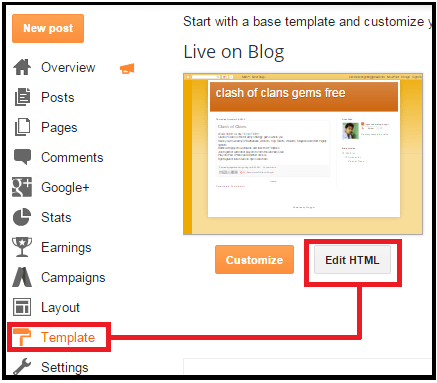
- Now navigate to Template in left side bar and click on it.
- Click on Edit HTML …..Expand Widget Templates
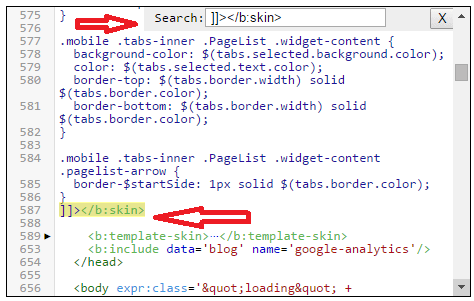
- Now Search for ]]></b:skin> by pressing Ctrl+F
- Now copy the below code and paste (Ctrl+V) this code just above ]]></b:skin>
Code Is Here
.post{border:1px solid  FFFFFF ;border-style:solid;border-radius: 10px ;
-moz-border-radius:10px;
-webkit-border-radius:10px;background: #ffffff ;margin:.1em 0 .5em;padding:0px 8px 0px 8px}
- Click on Preview to check your code and Save Template if its working fine.


No comments:
Post a Comment